


PARENT HELP
Take a read through our most frequently asked questions…
You will need…
Strong thick hair elastic to match hair colour
Hair pins
Bobby pins
Bun net or hair net
Brush or comb
Hairspray & Gel (For stage and exams only)

1. Brush hair to get rid of any knots and tangles.
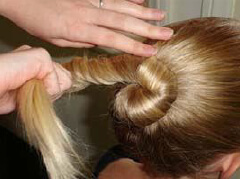
2. Brush hair and pull back into a ponytail, avoiding any “lumps and bumps”. Secure ponytail tightly with hair elastic. A neat and tight pony tail with hair drawn snugly back is the key to making a good ballet bun.
****For stage and exams: Brush gel and/or hairspray though the hair while putting it up in a pony tail. Smooth out any bits with extra gel and/or hairspray prior to doing the actual bun.
3. Twist the ponytail as you gradually wrap it around the hair elastic, inserting hair pins as you wrap, creating a, coiled circle. Be sure that your hair pins contain hair from both the head and the ponytail. This will hold your bun close and flat to your head.
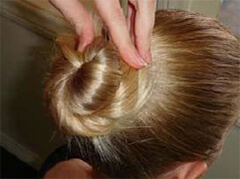
4. Wrap your hair net or bun net around the bun as many times as it will allow for a snug fit. Try not to make the net too tight, as this will make the bun protrude too much from the head causing an egg shaped bun!
5. Reposition the hair pins to hold the hair net in place, using extra pins if needed. The idea is to have your bun as flat as possible to the head.
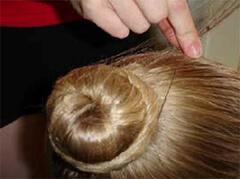
6. Use bobby pins or hair spray to pin back any stray hairs!
Black mascara
Charcoal/Darkest Brown eye shadow
White eye shadow
Red/Natural lip liner
Make up kits consisting of eye shadows and lip colour available for purchase at ‘The Canewear Depot’
Please note: make up is to be heavier than a regular daywear as it’s purpose is to highlight the facial features under the bright lights of the stage.

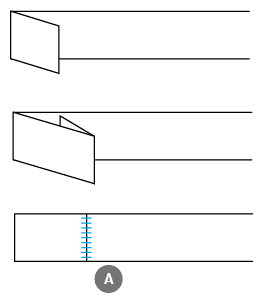
THE RIBBON
1. Cut ribbon into half then half again. So there are four pieces (two ribbons per shoe)
2 . Fold over ribbon 1cm then again 1cm Turn fold to face the inside of the shoe.Make sure the right side of your ribbon is on the outside when it is wrapped around the foot.
3 . Stitch down folded ribbon (See A) to secure BEFORE sewing on shoe Cotton should be appropriate colour.
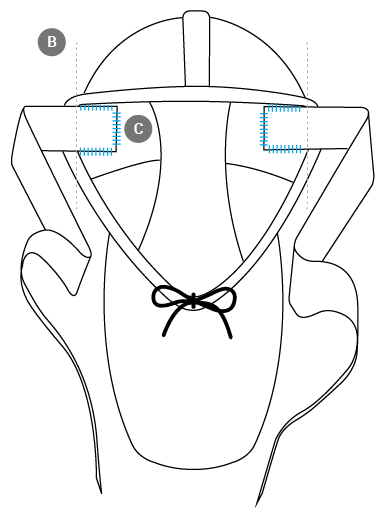
THE SHOE
4. Take your ballet slipper. Fold down heel towards toe. Where the heel meets the shoe at the side of slipper is where you sew on ribbons. (See B)
5. Sew on ribbons in a square (See C) Do not sew into the channel where the cord runs to tighten the ballet slipper.
6. Ballet shoes are tied with the foot flexed so they are not to tight when you point. The ribbons cross over the front of the foot around the ankle one over the other and the knot is tied towards the inside of the ankle off the Achilles Tendon. You can then cut your ribbons leaving enough to tuck them into ribbons around ankle to hide them. When you have taken the shoe OFF. Ask an adult to singe the end of the ribbons with a lighter when the shoe has been removed. This is to stop fraying.
7. For EXAMS and PERFORMANCES shoes must be CLEAN and knots sprayed with hair spray to stop them coming undone.
You’re welcome to sit in our wait area and observe every class in all 3 studios from our specially designed parent viewing windows. Our principal and instructors always welcome parents and family members to view our lessons.
Yes, we offer a free trial class in all styles for all new students.
Yes, we have compulsory uniforms for all dancers as this is part of the discipline of dance. You can find this information by CLICKING HERE
Please click on the following ink to see our latest timetable. TIMETABLE
Yes we do! Students are welcome to attend 3 make up classes per term. Please see reception to book your lessons.
Yes. Our concert is the highlight of the year! It’s a wonderful opportunity for all students to dance up on stage for an audience of family and friends. It is optional but highly recommended as it improves stage skills and builds confidence.
Families pay for tickets to view the concert and there is a small costume hire fee between $30 – $70 per student depending on how many classes per week your child takes. There is no sewing or making of costumes required.